Automatically deploying the Front End to the server using GitHub Actions
Introduction to GitHub Actions and Principles
I've been using GitHub Actions for a while now, and the current blog is automatically deployed to GitHub hosting using GitHub Action Auto-deploy to a public repository. Today, I'll detail the steps to successfully deploy the frontend to the server and share some insights based on my understanding. I'll complete the writing when I have some free time (after work 😭).
GitHub Actions Official Documentation: Automate, customize, and execute software development workflows in your GitHub repository. You can discover, create, and share actions to perform any job you'd like, including CI/CD, and integrate actions into completely customized workflows.
The documentation reveals the powerful capabilities of GitHub Actions in code management, run deployment, test pushing, and more, eliminating a lot of repetitive work. Deploying the frontend directly to the server through an ssh client requires installing various dependencies, which significantly reduces server efficiency and is not easy to correct.
This tutorial is an extension of Deploying a Static Website with Nginx Proxy Manager, eliminating the need to install node environments and various dependencies, and directly deploying the frontend in GitHub Action. After making changes to the backend files locally, deploy the frontend to the server. It achieves a one-time setup effect.
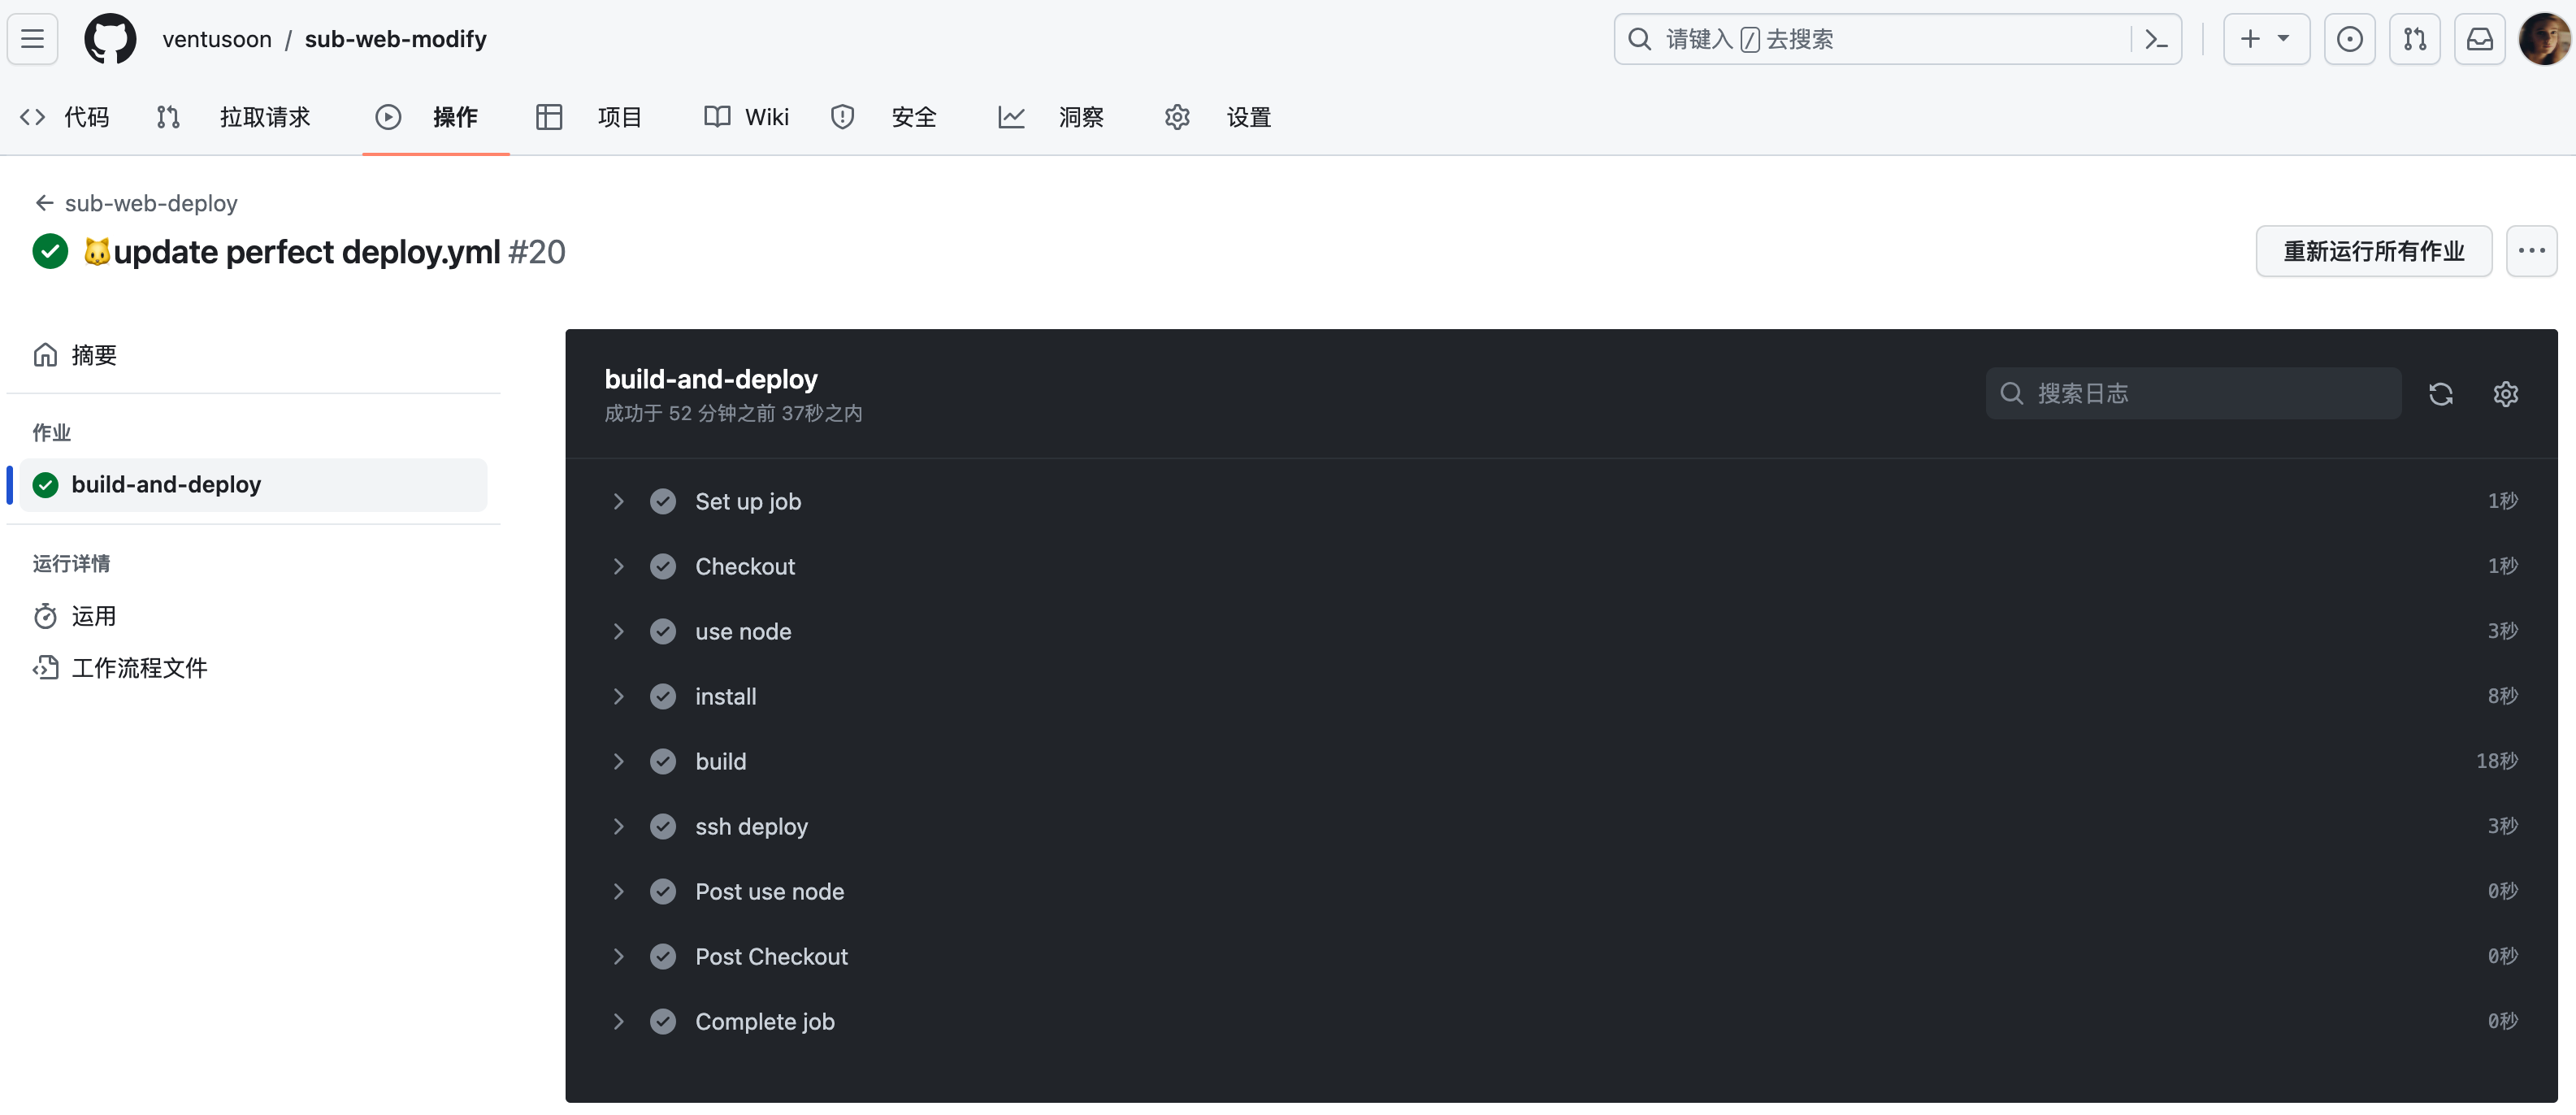
GitHub Action Successful Screenshot
- Analyzing the example, taking Auto-deploy to a public repository as an example, the GitHub Action workflow is analyzed as follows
name: luvsia-hugo-blog-autodeploy # Workflow name, name it yourself

on:
  push: # When the request is triggered
    branches:
      - main  # Branch to act on, here it's main, can also be master
  pull_request:

jobs: # Grouping all tasks run in the workflow file
  deploy:
    runs-on: ubuntu-latest
    concurrency:
      group: ${{ github.workflow }}-${{ github.ref }}
    steps:
      - uses: actions/checkout@v2
        with:               # If you used git submodule add when installing the theme
          submodules: true  # You don't need to comment out these three lines, this line is set to true
          fetch-depth: 0    # Fetch all history for .GitInfo and .Lastmod

      - name: Setup Hugo
        uses: peaceiris/actions-hugo@v2
        with:
          hugo-version: 'latest'  # Get the latest version of Hugo
          extended: true          # If you're not using the extended version of Hugo, change true to false

      - name: Build
        run: hugo   # Use Hugo to build the static website

      - name: Deploy to github
        uses: peaceiris/actions-gh-pages@v3
        if: ${{ github.ref == 'refs/heads/main' }}  # Make sure to fill in main or master
        with:
          personal_token: ${{ secrets.PERSONAL_TOKEN }} # If you used a different name for the secret, replace PERSONAL_TOKEN
          external_repository: ventusoon/LuvSia # Fill in the remote public repository
          publish_dir: ./public
          cname: luvsia.com        # Fill in the custom domain
- According to the example analysis, a simple GitHub Actions flowchart is as follows
Action
1️⃣ Action Conditions
Time Node
Branch
2️⃣ Work Tasks
Operating Environment
Step One
Step Two
Step N
Directly Publish to Server/Local/Hosted Page
Hands-on Practice
Because it needs to be deployed to the server, you need to understand the way to connect to the server. Here we choose ssh connection, there are many tutorials online that also use sftp connection, both are fine.
GitHub Actions deployment files are usually named
xxx.ymland are located in the project's root directory/ .github/workflows/xxx.yml.Edit
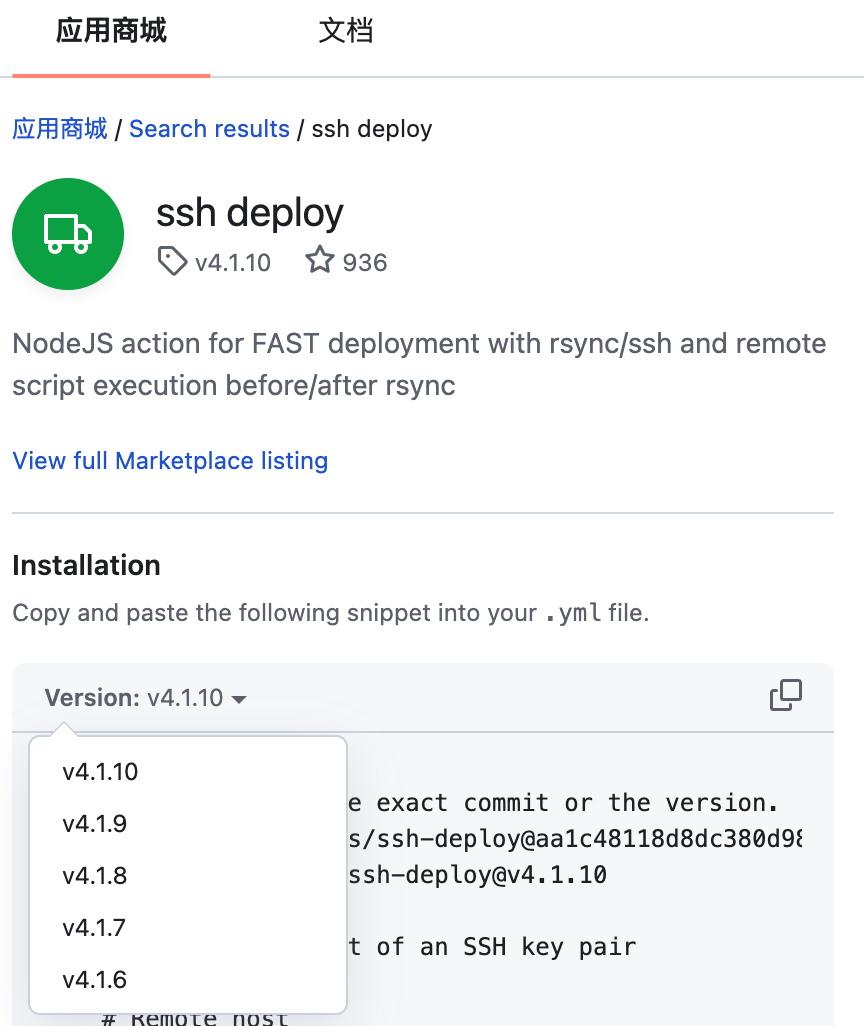
xxx.ymlon the GitHub page, and you can see many featured Actions on the right side in the App Marketplace. Since it is an ssh connection, choose the highly-ratedssh-deployapp here and use the latest version.
ssh-deploy App
| Config Name | Purpose | Example |
|---|---|---|
| SSH_PRIVATE_KEY | SSH key | The key should be generated in PEM format |
| REMOTE_HOST | Remote host | 10.10.10.10 |
| REMOTE_USER | User | root |
| REMOTE_PORT | Port | Default 22 |
| SOURCE | Source, content to deploy | /dist/ |
| TARGET | Target, path to deploy | /data/docker_data/npm/data/sub.ven2s.cn/ |
| ARGS | Arguments passed to rsync (during sync) | -avz --delete |
| SSH_CMD_ARGS | A set of ssh arguments, they must be prefixed with -o and separated by commas | -o SomeArgument=no, -o SomeOtherArgument=5 |
| EXCLUDE | Paths to exclude, separated by commas | /dist/, /node_modules/ |
| SCRIPT_BEFORE | Script to run on the host machine before rsync | mkdir -p /data/docker_data/npm/data/sub.ven2s.cn |
| SCRIPT_AFTER | Script to run on the host machine after rsync | reboot |
- With the above preliminary work, we can now start the operation.
Configure Key on the Server
- In the
rootdirectory, enter
ssh-keygen -m PEM -t rsa -b 4096

# Generate key files, press Enter twice in a row.
# Note: You should not set a password for the private key you generated (leave it empty). The rsync ssh (used for deployment) does not support entering the private key password as a command line argument.
- At this point, private key file
id_dsaand public key fileid_dsa.pubare generated in the/root/.ssh/directory. Generateauthorized_keysbased on the public key file, and set the permissions for the three files.
cat ~/.ssh/id_rsa.pub >> ~/.ssh/authorized_keys
chmod 600 ~/.ssh/id_rsa
chmod 600 ~/.ssh/id_rsa.pub
chmod 600 ~/.ssh/authorized_keys
- At this point, the server-side work is completed objectively. If you encounter various error prompts during the connection, please Google on your own. I won't go into details here.
Set Repository Key in the Project
- Funny thing, I mistakenly filled the Repository Key into Code Space Secret, and I couldn't connect. I thought it was a problem with the server. The day before yesterday, I even hallucinated and accidentally ran
rm -rf /......
Repository Secret Location in GitHub Project
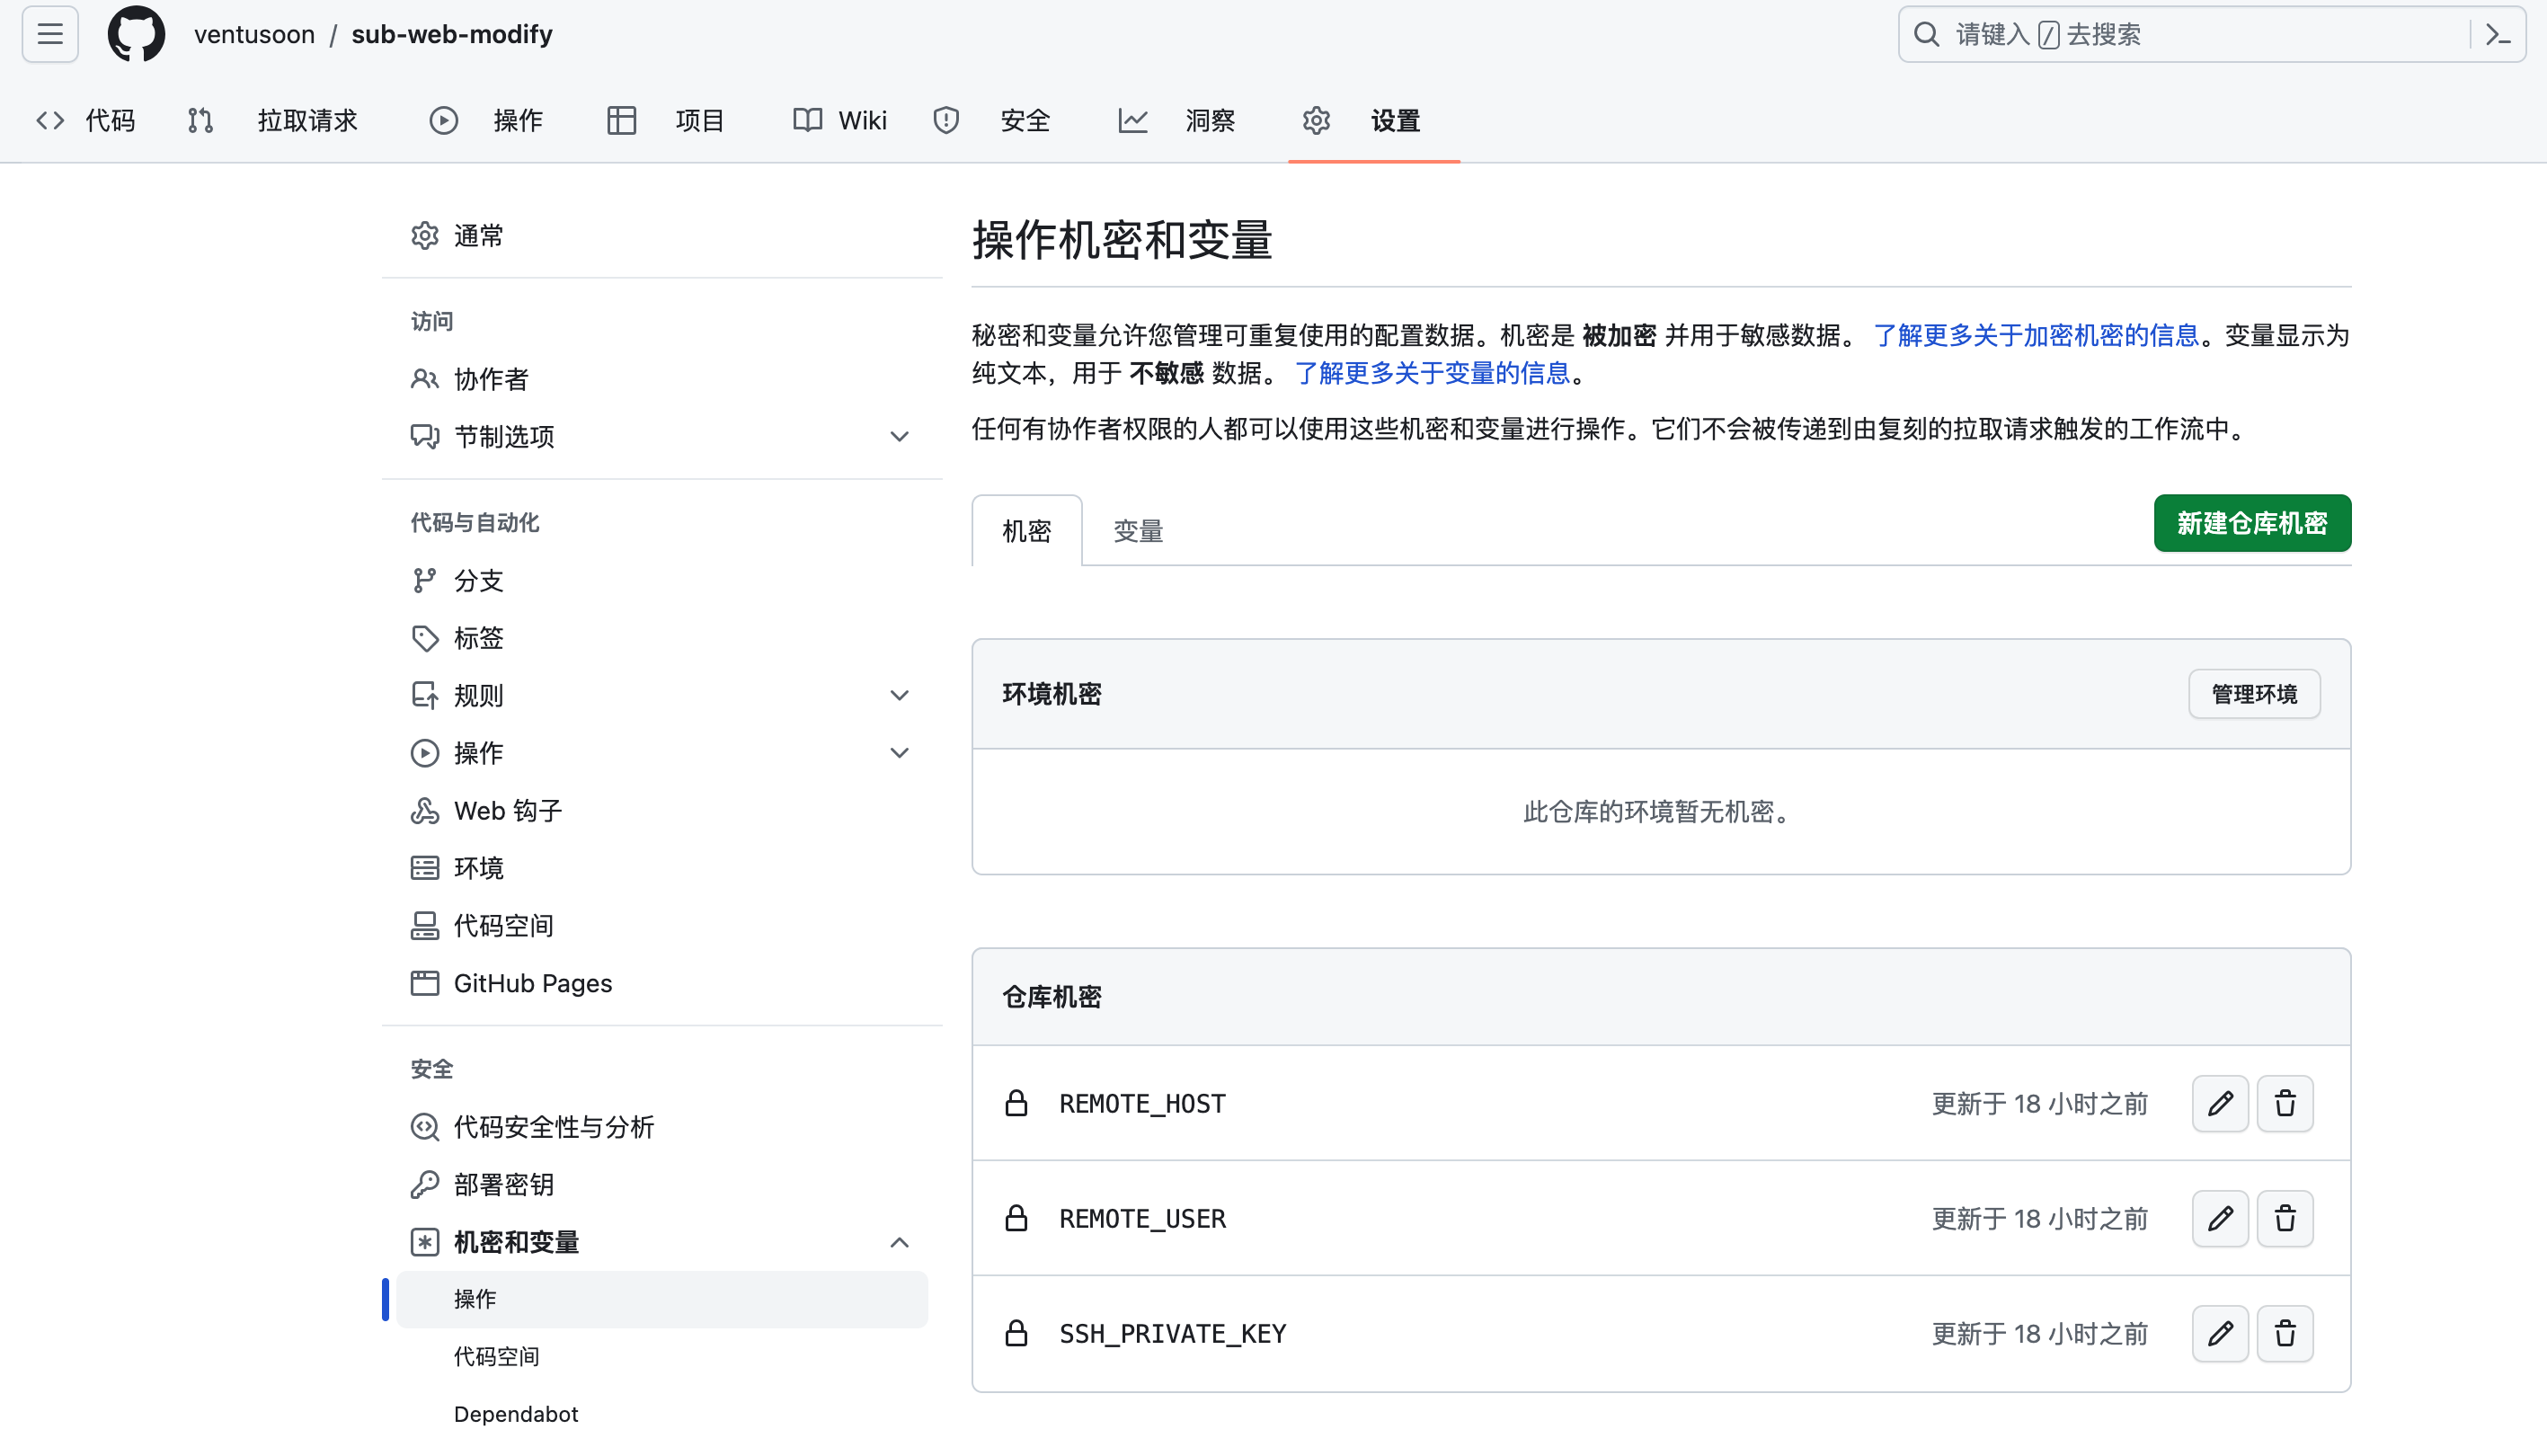
- In the
catkey on the server, copy all contents into the SSH_PRIVATE_KEY in the image above, and fill in the server IP in REMOTE_HOST, and fill inrootin REMOTE_USER. (Or directly fill in "root" in the yml file)
cat ~/.ssh/id_rsa
or
REMOTE_USER: "root"
Publish Deployment Files to Remote
- I've put the files for automatically publishing the nginx-proxy-manager static page below. Modify the configuration according to your own operating environment and dependencies.
# Name of the current workflow
name: sub-web-deploy
on:
  push:
    branches:
      - master

jobs: # Tasks to build, a workflow has multiple build tasks,
  build-and-deploy:
    runs-on: ubuntu-latest # What server to run these tasks on, using the latest version of ubuntu here

    steps: # Steps of the build task, a task can be divided into multiple steps
      # Switch branch
      - name: Checkout
        uses: actions/checkout@v4
      # Step 2 Install node on the current server
      - name: use node
        uses: actions/[email protected]
        with:
          node-version: 18
          cache: "yarn"
      # Step 3 Download project dependencies
      - name: install
        run: yarn install
      # Step 4 Package the node project
      - name: build
        run: yarn build
      # Step 5 Deploy the project to the server
      - name: ssh deploy
        uses: easingthemes/[email protected]
        with:
      # Private key part of an SSH key pair
          SSH_PRIVATE_KEY: ${{ secrets.SSH_PRIVATE_KEY }}
      # Remote host
          REMOTE_HOST: ${{ secrets.REMOTE_HOST }}
      # Remote user
          REMOTE_USER: ${{ secrets.REMOTE_USER }}
      # Source directory, path relative to `$GITHUB_WORKSPACE` root, eg: `dist/`
          SOURCE: "/dist/"
      # Script to run on host machine before rsync
          SCRIPT_BEFORE: "mkdir -p /data/docker_data/npm/data/sub.ven2s.cn"
      # Target directory
          TARGET: "/data/docker_data/npm/data/sub.ven2s.cn/"
If you like, please share this page, if you have any questions, please leave a comment
Mission Accomplished
