
Building Your Own Subscription Conversion Link
Front-end Construction of Sub-Web-Modify
This project is based on CareyWang/sub-web, with remade CSS styles, solving most layout details, adding "Dark Mode" with automatic switch between light/dark modes (manually switchable by clicking the "sun/moon" icon), adding "Advanced Functions" toggle, adding short link selection/customization functionality, incorporating nearly a hundred remote configurations, introducing sub-web aggregate API, and adding features like uploading custom remote configurations/JS advanced sorting nodes/JS advanced filtering nodes!
Update the system and install Node and Yarn
Run the following four lines of code in order. If you are using CentOS, please replace apt with yum in the first two commands.
apt update -y
apt install -y curl wget sudo nodejs git
apt install npm
npm install -g yarn
After the commands are executed, run the following code to check if Node and Yarn are installed successfully. If successful, it will return the version numbers.
node -v
yarn --version
Download and install sub-web-modify
Clone the sub-web-modify program and navigate into the sub-web-modify folder.
git clone https://github.com/youshandefeiyang/sub-web-modify.git
cd sub-web-modify
Install the build dependencies in the project directory. The build process may take a bit of time.
yarn install
Run the Web client using webpack for local development.
yarn serve
If the following image appears, the front-end debugging mode has started successfully.
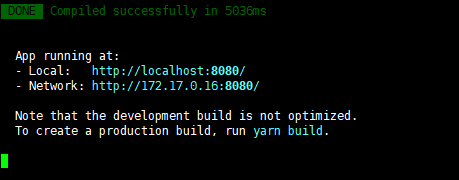
Now, if we access http://server-ip:8080/ in our browser, we should be able to preview the front-end of sub-web-modify.
Remember to open the firewall and security group for port 8082.
Modify the default backend address and add remote rules
Find the file /root/sub-web-modify/src/views/Subconverter.vue in your VPS and open it with an editor.
Find backendOptions: and enter your parsed backend address. The domain is the backend domain you prepared earlier, change http to https, and add /sub? as a suffix. (This will make your backend address appear in the options below).
If you don't want to use the backend author's default conversion, you can change const defaultBackend = to your own domain, don't forget to add "".
Find remoteConfig: [, press Enter, and copy your favorite rules.
After configuring, package the website
After configuring, the program will update automatically. Refresh the front-end webpage, and the rules you just added will appear.
After modifying the default backend address and the original configuration rules, you are done.
Now, our front-end debugging is complete. We now need to package and deploy it.
First, stop the debugging program with CTRL+C. Exit the current debugging, and then run the following command to package:
yarn build
Execute the following packaging command. A dist directory will be generated under /root/sub-web-modify, and this directory is the publishing directory of the website.
Copy all the files inside this directory to the root directory of your front-end site.
One-click setup for the front end
cd /root && git clone https://github.com/youshandefeiyang/sub-web-modify.git && chmod -R 755 sub-web-modify && cd sub-web-modify && yarn install && yarn build
Publish the front end
If you haven't installed Baota, go to the official Baota website to see the installation tutorial.
In the Baota panel, click to add a site, and add the front-end site separately, and configure the SSL certificate.
Copy all the files in the /root/sub-web/dist folder to the root directory of the front-end site.
Visit the website, and the front end is now deployed.
SubConverter Backend Construction
Create a backend site and reverse proxy
In the Baota panel, create a backend site, configure SSL, and set up the site to reverse proxy to port 25500.
Click on the name of the newly created backend site in the Baota panel, and in the pop-up message box, click on reverse proxy to add a proxy.
The reverse proxy configuration method is as follows:

After setting up, let's start installing the backend.
Build the backend program
Here we can build the backend program in two ways: the first is to build it with binary files, and the second is to use Docker. I personally recommend Docker for its simple configuration with just one command.
Method One: Build with binary files
Download and unzip the subconverter binary file
cd /root
wget https://github.com/tindy2013/subconverter/releases/download/v0.7.2/subconverter_linux64.tar.gz
tar -zxvf subconverter_linux64.tar.gz
After completion, a folder called subconverter will appear in the /root folder, and this is our backend program.
Modify the configuration file parameters
Now we need to modify some parameters in the backend configuration file.
Find the file /root/subconverter/pref.ini on your VPS and find the following parameters to modify:
api_access_token=123123dfsdsdfsdfsdf            # Set it randomly, as long as you know it
managed_config_prefix=https://sub.yourdomin.com  # Set it to the backend domain we just parsed, changing http to https and adding /sub? as a suffix (this will make the backend address appear)
listen=127.0.0.1                                # Change this to 127.0.0.1 for reverse proxy
Create a service process and start it
Next, we need to create a service to run the backend program automatically every time the VPS is restarted or booted.
Find the directory /etc/systemd/system on your VPS and create a file named sub.service.
Open the file and paste the following content, then save.
[Unit]
Description=A API For Subscription Convert
After=network.target

[Service]
Type=simple
ExecStart=/root/subconverter/subconverter
WorkingDirectory=/root/subconverter
Restart=always
RestartSec=10

[Install]
WantedBy=multi-user.target
Check the running status and set up auto-start on boot
systemctl daemon-reload
systemctl start sub
systemctl enable sub
systemctl status sub
At this point, the backend is also set up. You can now access our backend in the browser by visiting the backend domain. Backend setup successful!
Method Two: Docker Container Setup
If your server has Docker installed, you can use the following command:
docker run -d --restart=always -p 25500:25500 tindy2013/subconverter:latest
Then, use the following command to confirm the status:
curl http://localhost:25500/version
If it outputs the current subconverter container version, the setup is successful.